
At Home Troubleshooting Guide
Learning about your Network
Here are a few tips to help improve your Wi-Fi coverage and experience at home, which can make a big difference in your daily activities.
Optimal Router Placement: Place your router in a central location, away from walls and obstructions. Elevate if possible, as this can help distribute the signal more evenly. Please call support if you may want to move your routers location, this may require a technician. Below are some ideal router placement locations.
- Central Location: Place your router in the center of your home. This helps reduce dead spots and ensure that the signal reaches all areas more evenly.
- Elevated Position: Position the router on a high shelf or mount it on a wall. Wi-Fi signals spread out and downward, so an elevated position can help cover a larger area.
- Avoid Corners, Walls, and Large Furniture: Placing the router near walls or in corners can limit the signal's reach. Try to position it in a more open area to maximize coverage.
- Away from Interference: Keep the router away from other electronic devices that can cause interference, such as microwaves, cordless phones, and baby monitors. These devices can disrupt the Wi-Fi signal.
- Open Space: Avoid placing the router in enclosed spaces or behind furniture. Wi-Fi signals can be obstructed by walls and objects, so an open space allows for better signal distribution.
- Near Devices: If you have specific devices that require a strong connection (like a gaming console or smart TV), try to position the router closer to those devices.
- Antenna Position: If your router has external antennas, adjust them for optimal coverage. Typically, positioning one antenna vertically and one horizontally can help cover both horizontal and vertical spaces.
- Update Firmware: Check your router's firmware to ensure it is up to date. Manufacturers often release updates that can improve performance and security. This can be easily checked by calling the office.
- Use a Wi-Fi Extender or Mesh System: If you have dead spots in your home, consider using a Wi-Fi extender or a mesh Wi-Fi system to boost coverage.
Wi-Fi Extender
A Wi-Fi extender, also know as a booster or repeater, works by receiving and amplifying your Wi-Fi signal, then transmitting the boosted signal. This can help eliminate dead spots and extend coverage to areas where the signal is weak.
- Extended Coverage: Helps reach areas that your main router can't cover
- Easy Setup: generally simple to set up and configure
- Cost Efficiency: Often less expensive than upgrading to a new route or a mesh system
Mesh Wi-Fi System
A mesh Wi-Fi system consists of multiple units (nodes) that work together to create a single, seamless network. Each node communicates with the others to provide consistent coverage throughout your home. Key benefits include:
- Seamless Coverage: Provides uniform coverage with no dead spots, as each node works together to distribute the signal
- Scalability: Makes it easy to add more nodes to expand coverage as needed
- Single Network Name: Uses a single network name (SSID), allowing devices to switch between nodes seamlessly
- Advanced Features: Often comes with additional features like parental controls, guest networks, and better security options
Choosing Between Extenders and Mesh Systems
- Wi-Fi Extender: Best for smaller homes or specific areas with weak signals
- Mesh Wi-Fi System: Ideal for larger homes or spaces with multiple floors, where consistent coverage is needed throughout.
Troubleshoot Connection Issues
If you’re connected to your Wi-Fi but still don’t have internet access, there’s probably something wrong with your internet signal. The same is true if you’re unable to access the internet using a wired connection. Try these fixes first:
Power cycle your ONT, router, and device.
Power cycling your ONT and router should be the first thing you do when encountering an internet signal issue. Don’t skip this step! This is almost always what tech support will ask you to try first, as it often solves the problem.
To power cycle your equipment, unplug the power cable for 60 seconds and plug it back in. The equipment will take a few minutes to reboot. It’s also a good idea to restart the device you’re using.
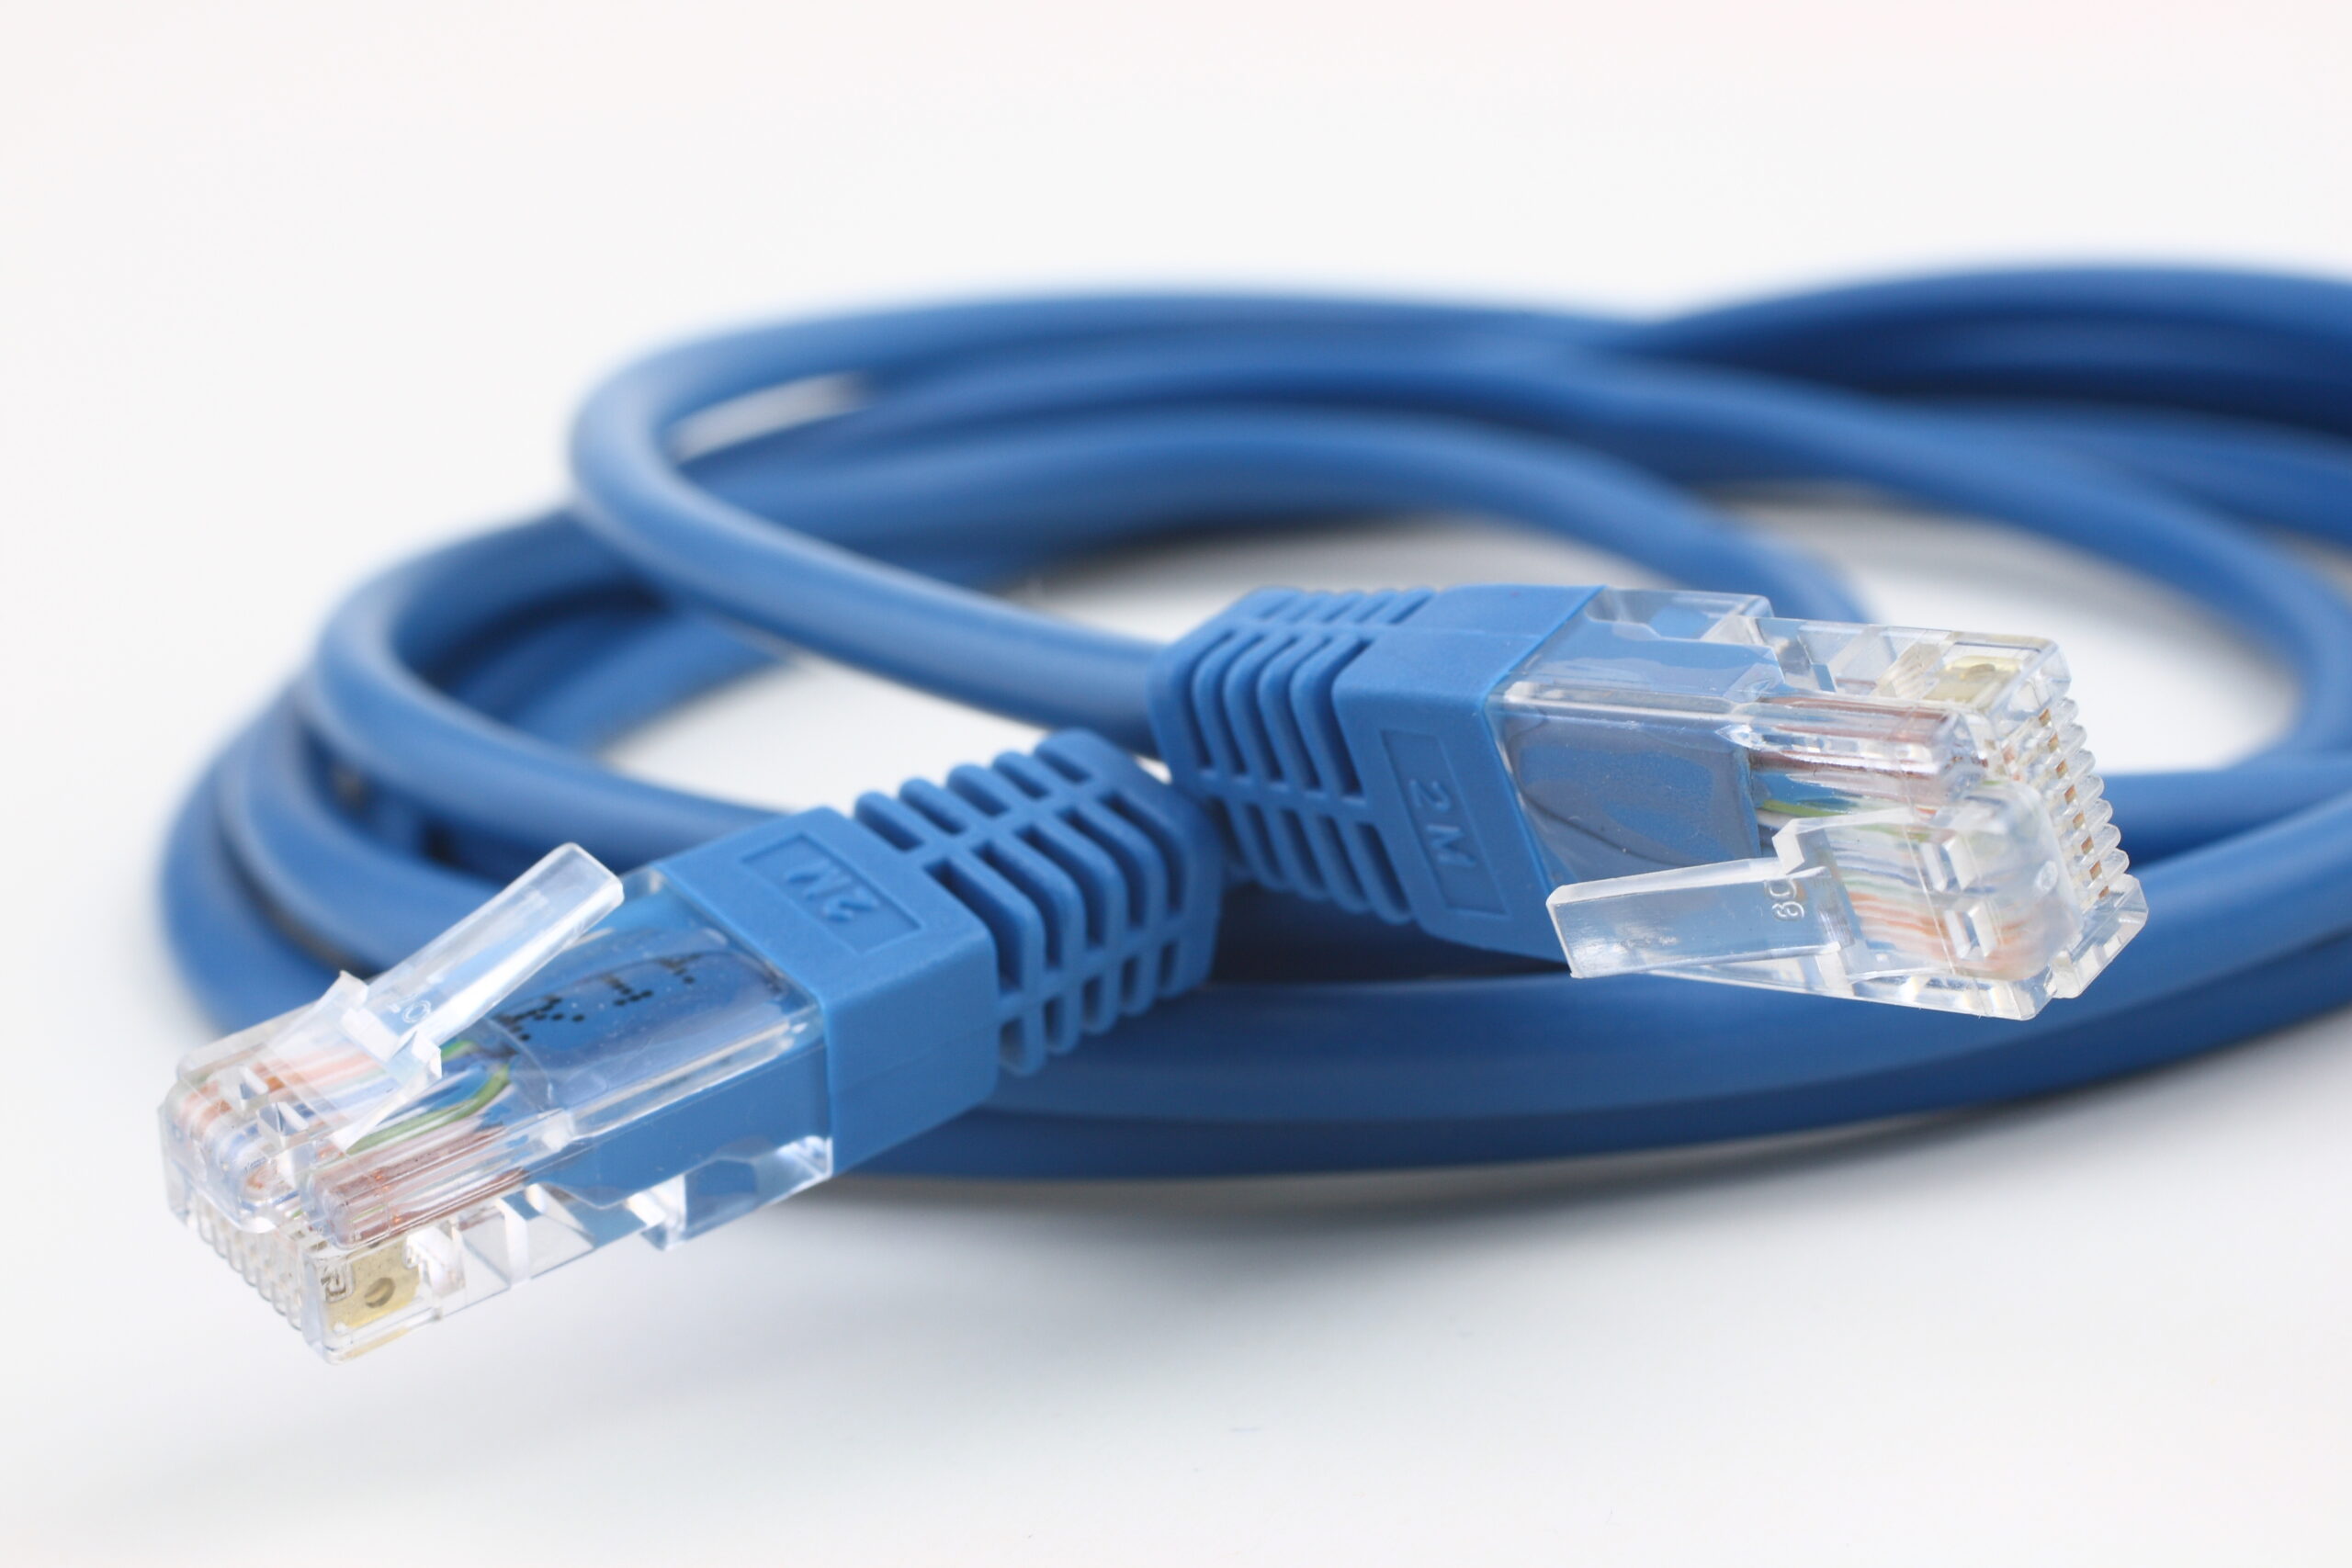
Check your cables and wires.
Wires and cables often become loose or damaged from repeated stress. The cable feeding the internet to your modem is either a fiber optic cable or an Ethernet cable.
Check for damage. See if the cable looks torn or perhaps chewed by a pet. Ethernet and fiber cables are especially prone to damage, as the copper wires or the fiber optic filament inside are very thin.
If you detect any damage, please contact support so we can dispatch a technician to help with the repairs.
Avoid unplugging and plugging fiber optic cables, as the filament is fragile.
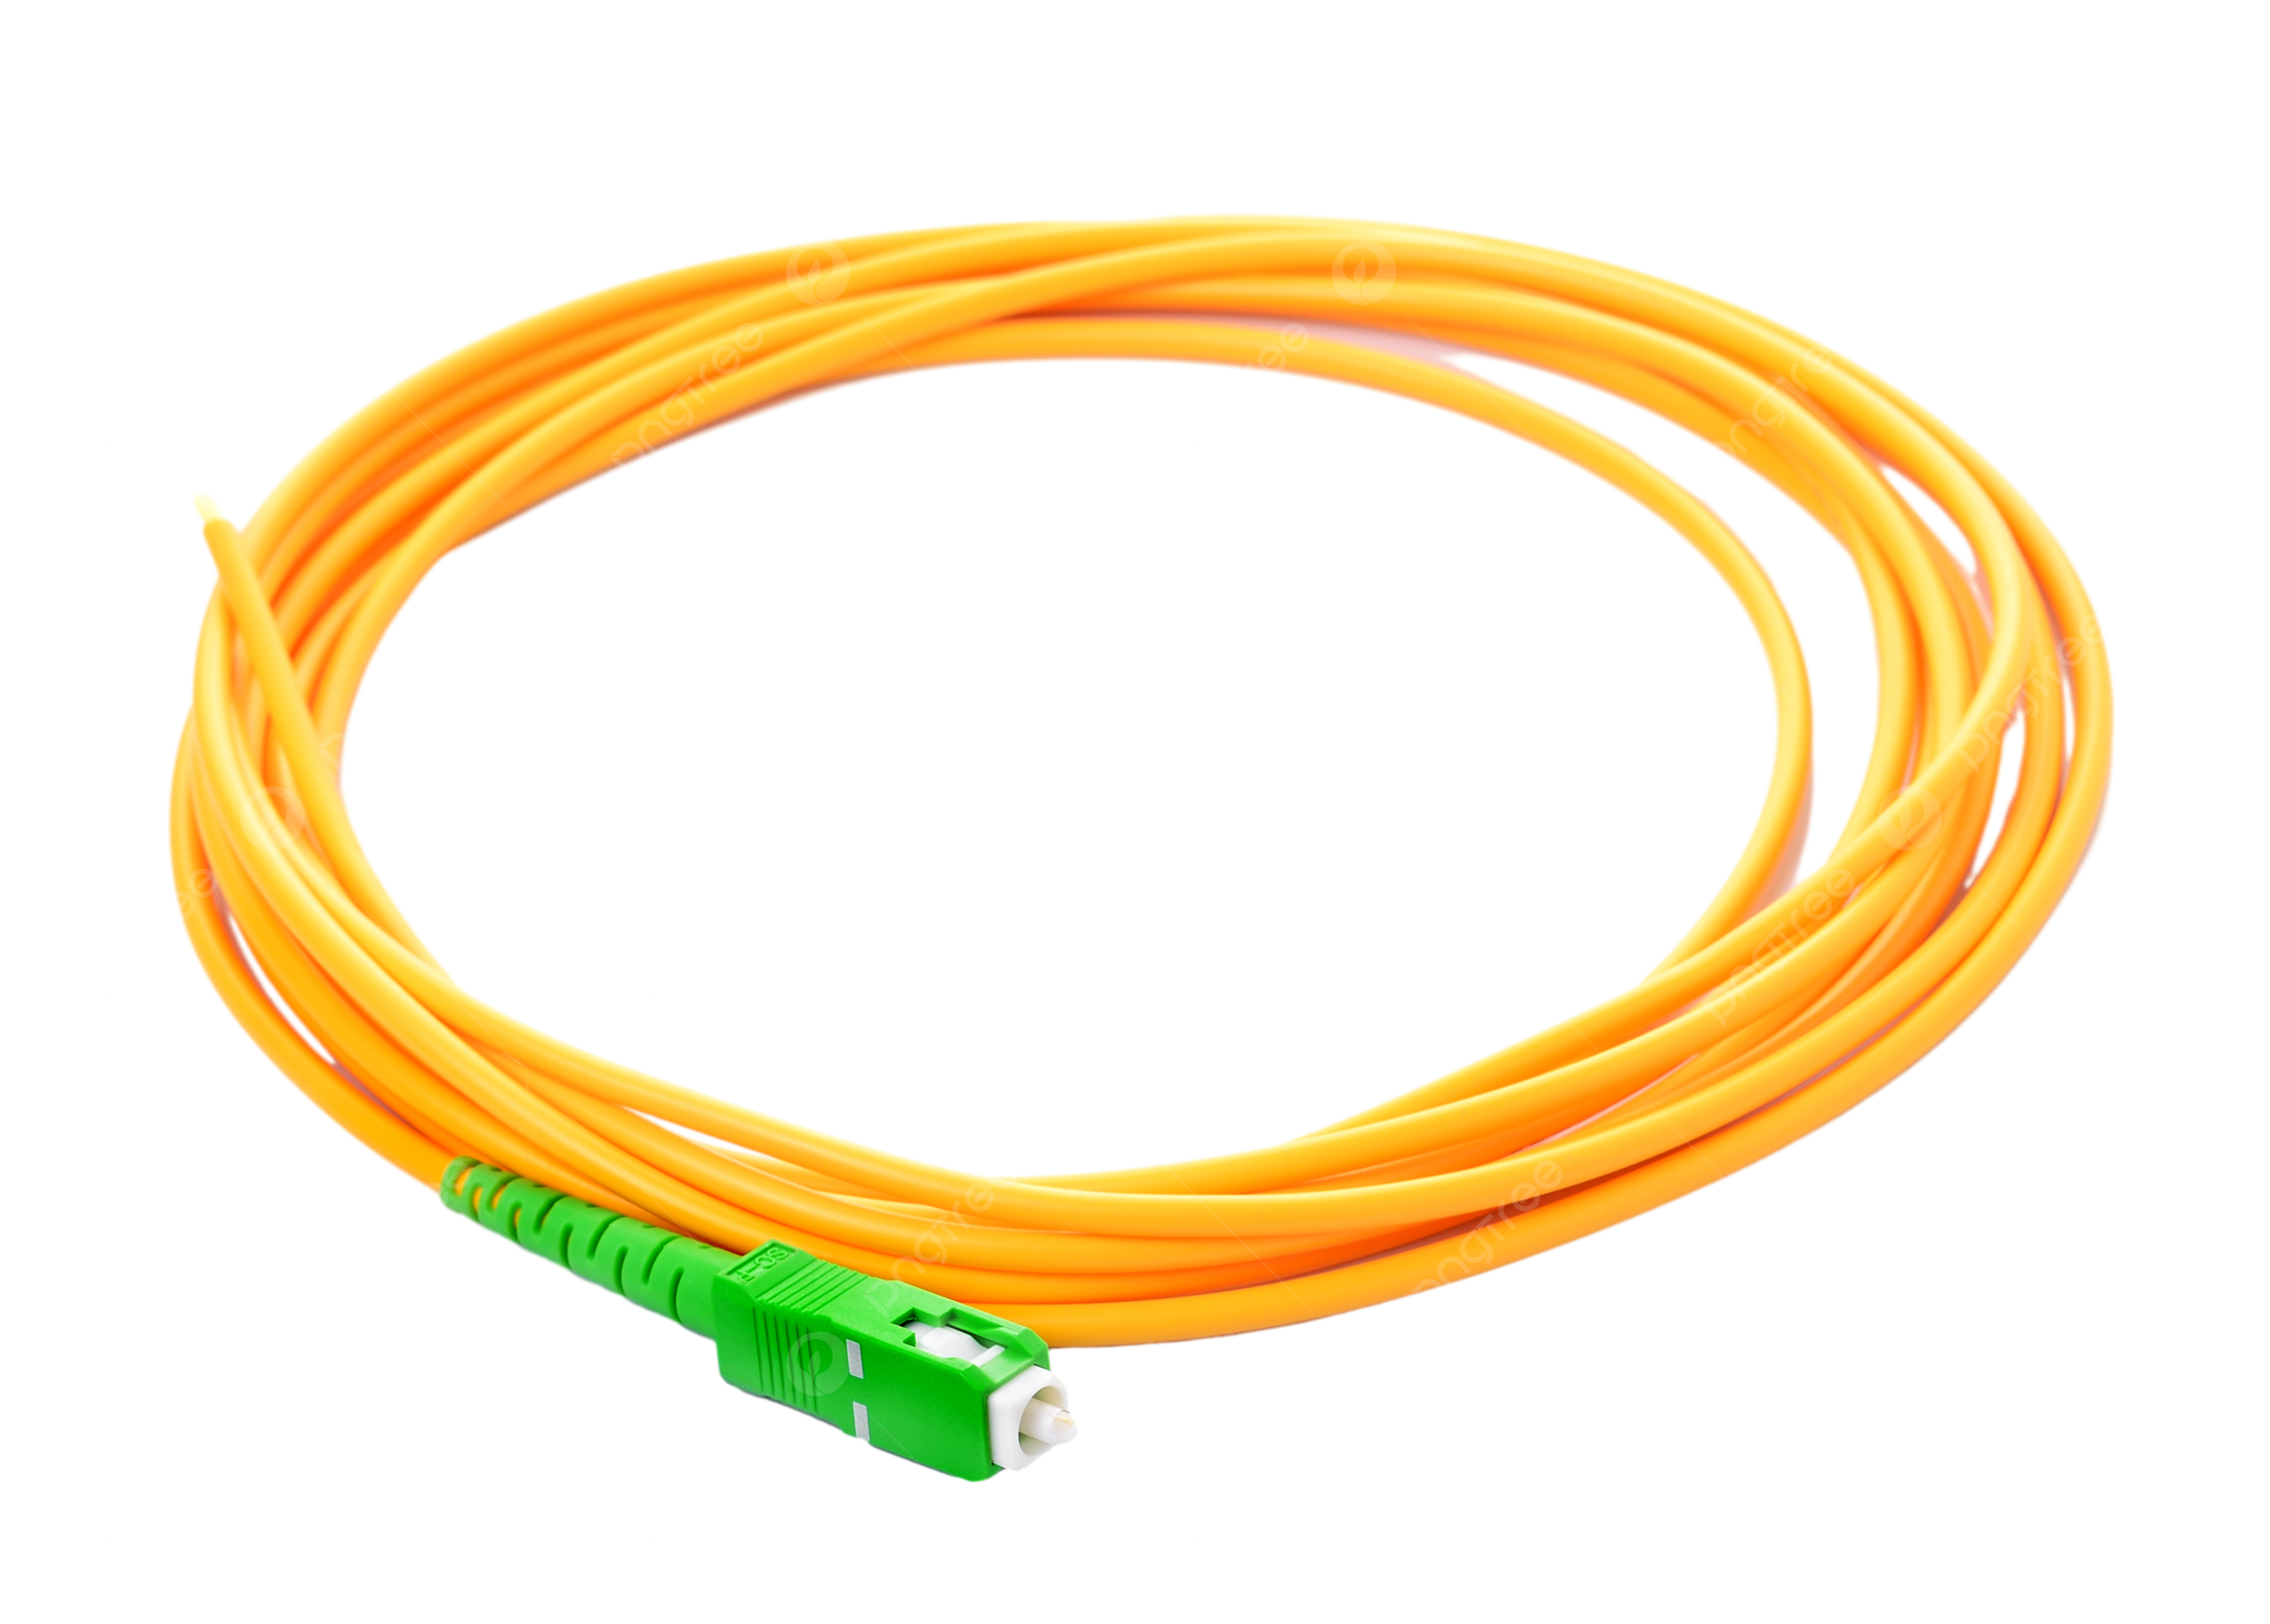
NEVER unplug the fiber optic cable from the ONT, as it is a laser and can cause eye damage if pointed directly at the eyes.
You may check the seating on the Ethernet cables by:
- Checking that the cable is plugged into the correct port. On Calix Routers, this port will be the port at the very bottom of the row of ports and is labeled WAN.
- The port labeld WAN, is the internet service coming from your ISP (internet service provider). Ports labeled LAN are for your wired ethernet connected devices; such as a computer, printer, or gaming console.
- Unplug and reconnect making sure that you hear a click on reconnection.
How to Connect Devices to Your Wi-Fi
To connect devices your Wi-Fi, you'll need the router's username and password. Follow the instructions below to add your devices.
If these steps don't work, please contact the device manufacturer for further assistance, as the issue may be device-specific and not related to your internet provider.
Adding a smartphone or tablet
Apple IOS Device
From your Home screen, select:
- Settings --> Wi-Fi enable Wi-Fi choose a Network --> enter Wi-Fi password --> select Join
Android Device
Start from Apps and select:
- Settings --> Wi-Fi enable Wi-Fi choose a Network --> enter Wi-Fi password --> select Join
Please be aware that once you enable Wi-Fi on your device, it will automatially search for any available Wi-Fi networks in the vicinity.
Add a computer (Mac or PC)
- Find the Wi-Fi icon on your computer and ensure that it is activated.
- Select the option for Wi-Fi to display the available networks.
- Select your network name and enter your Wi-Fi password. Then, click on the options labeled "Join," "Connect," or similar on your computer.
Add a game console
- For the fastest connection speed, connect an Ethernet cable from your game console directly into the LAN port on your router. If you prefer to connect your gaming system wirelessly, follow these simple steps:
- Find the Connection settings or Network settings menu on your gaming system.
- Choose the Wi-Fi or Wireless option and allow your system to scan for available Wi-Fi networks.
- Choose your Wi-Fi network and enter your Wi-Fi password.
- Your gaming system might provide you with the option to test the connection. It is possible that you might need to make some adjustments to your network security or parental control settings. For further information, please consult your gaming system's user guide.
- Adjust your Wi-Fi settings to match the requirements of your gaming system.
- Make sure it's plugged in and powered on.
- On the printer's scren or control panel, look for Network, Wi-Fi, or Wireless Settings.
- Select something like "Wireless Setup Wizard" or "Wi-Fi Setup." Your printer will start searching for available networks.
- Tap your Wi-Fi name (SSID ) from the list that appears.
- Carefully type in your Wi-Fi password. Double-check for typos, as Wi-Fi passwords are case-sensitive.
- Once connected your printer may show a confirmation message or Wi-Fi icon.
- Windows: Go to Settngs --> Devices --> Printers & Scanners --> Add a printer or scanner
- Mac: Go to System Settings --> Printers & Scanners --> Add Printer
- Use your remote to power on the TV.
- Press the Settings button (it may look like a gear icon) on your remote. If your remote doesn’t have that button, press the Home button and navigate to Settings.
- In the Settings menu, scroll to and select Network, then choose Wi-Fi Connection.
- Your TV will scan for available networks. Select your home Wi-Fi name from the list.
- Use the on-screen keyboard to enter your Wi-Fi password. Be sure to enter it exactly, as passwords are case-sensitive.
- Once entered, your TV will connect to the network. You’ll see a confirmation message when it’s successful.
- Try opening a streaming app like Netflix, Hulu, or YouTube to make sure everything’s working.
- Use your remote to power on the TV.
- Press the Home button on your remote, then scroll to and select Settings.
- In the Settings menu, select General, then choose Network.
- Choose Open Network Settings, then select Wireless as your network type.
- Your TV will scan for available networks. Select your home Wi-Fi name from the list.
- Use the on-screen keyboard to enter your Wi-Fi password. Be sure to enter it exactly, as passwords are case-sensitive.
- Once entered, your TV will connect to the network. You’ll see a confirmation message when it’s successful.
- Try opening a streaming app like Netflix, Hulu, or YouTube to make sure everything’s working.
- Use your remote to power on the TV.
- Press the Menu button on your remote. If your remote doesn’t have one, press the Settings or Gear icon.
- Scroll to and select Network, then choose Network Connection or Wireless.
- Your TV will scan for available networks. Choose your home Wi-Fi name from the list.
- Use the on-screen keyboard to enter your Wi-Fi password. Be sure to enter it exactly, as passwords are case-sensitive.
- Once entered, your TV will connect to the network. You’ll see a confirmation message when it’s successful.
- Try opening a streaming app like Netflix, Hulu, or YouTube to make sure everything’s working.
- Use your remote to power it on. If this is your first time setting it up, the guided setup will start automatically.
- From the Roku home screen, scroll down and select Settings.
- In the Settings menu, choose Network, then select Set up connection.
- Select Wireless as your connection type. Your Roku TV will begin scanning for available Wi-Fi networks.
- Find and select your home Wi-Fi name from the list.
- Use the on-screen keyboard to enter your Wi-Fi password. Be sure to enter it exactly, as passwords are case-sensitive.
- Once connected, your Roku TV will confirm the connection and may check for software updates.
- Try opening a streaming app like Netflix, Hulu, or YouTube to make sure everything’s working.
- Make sure your Fire Stick is plugged into your TV’s HDMI port and connected to power. Turn on your TV and select the correct HDMI input.
- Using your Fire Stick remote to navigate to the Home screen. Then, scroll to and select Settings in the top menu.
- In the Settings menu, choose Network. Your Fire Stick will start scanning for available Wi-Fi networks.
- From the list of networks, select your home Wi-Fi name.
- Use the on-screen keyboard to enter your Wi-Fi password. Be sure to enter it exactly, as passwords are case-sensitive.
- Once entered, your Fire Stick will connect to the network. You’ll see a confirmation message when it’s successful.
- Try opening a streaming app like Netflix, Hulu, or YouTube to make sure everything’s working.
- Make sure your Apple TV is plugged in and powered on. Use your Siri Remote to get started.
- From the Home screen, go to Settings.
- In the Settings menu, select Network.
- Under the Network section, select Wi-Fi. Your Apple TV will begin scanning for available networks.
- Choose your home Wi-Fi name from the list of available networks.
- Use the on-screen keyboard to enter your Wi-Fi password. Be sure to enter it exactly, as passwords are case-sensitive.
- Once entered, your Apple TV will connect to the network. You’ll see a checkmark next to your network name when it’s connected.
- Try opening a streaming app like Netflix, Hulu, or YouTube to make sure everything’s working.
How to Connect Your Printer to Wi-Fi
Step 1: Turn On Your Printer
Step 2: Open Wireless Settings
Step 3: Choose Wi-Fi Setup
Step 4: Pick Your Wi-Fi Network
Step 5: Enter Your Wi-Fi Password
Step 6: You are Connected!
Step 7: Add the Printer to Your Computer
How to Connect Your LG Smart TV to Wi-Fi
Step 1: Turn on your TV
Step 2: Open the Settings Menu
Step 3: Go to Network Settings
Step 4: Choose Your Wi-Fi Network
Step 5: Enter Your Wi-Fi Password
Step 6: Connect and Confirm
How to Connect Your Samsung Smart TV to Wi-Fi
Step 1: Turn on your TV
Step 2: Open the Settings Menu
Step 3: Go to Network Settings
Step 4: Select Wireless
Step 5: Choose Your Wi-Fi Network
Step 6: Enter Your Wi-Fi Password
Step 7: Confirm and Connect
How to Connect Your Vizio TV to Wi-Fi
Step 1: Turn on your TV
Step 2: Open the Menu
Step 3: Go to Network Settings
Step 4: Select Your Wi-Fi Network
Step 5: Enter Your Wi-Fi Password
Step 6: Connect and Confirm
How to Connect Your Roku TV to Wi-Fi
Step 1: Turn on your Roku TV
Step 2: Go to Settings
Step 3: Select Network
Step 4: Choose Wireless
Step 5: Pick Your Wi-Fi Network
Step 6: Enter Your Wi-Fi Password
Step 7: Connect and Confirm
How to Connect Your Fire Stick to Wi-Fi
Step 1: Plug in and Power Up
Step 2: Go to Settings
Step 3: Select Network
Step 4: Choose Your Wi-Fi Network
Step 5: Enter Your Wi-Fi Password
Step 6: Connect and Confirm
How to Connect Your Apple TV to Wi-Fi
Step 1: Turn on your Apple TV
Step 2: Open the Settings Menu
Step 3: Go to Network Settings
Step 4: Choose Wi-Fi
Step 5: Select Your Wi-Fi Network
Step 6: Enter Your Wi-Fi Password
Step 7: Connect and Confirm
Step 8: Test the Connection
How to Peform a Speed Test
Running a speed test is a quick and easy way to check the performance of your internet connection. Whether you're troubleshooting a slow connecteion or just curious abut your current speeds, here's how to get the most accurate results.
Before you Begin
To ensure your speed test reflects your actual internet performance:
- Restart your modem/router to clear up temporary issues.
- Use a wired connecton for the most accurate results.
- Close background apps or devices using bandwidth.
- Test at different times to account for network congestion.
- Turn off your VPN, if applicable, as it will deteriorate your speed naturally.
Before You Begin
- Choose a reliable speed test site (right-click > Open Link in new tab): speedtest.net
- Click on the "GO" Button and wait for your results. They default to the optimal server for you, Select "Change Server" if you wish to change this for any reason.
- Wait for the test results to finish, this ususally takes less than a minute to measure. The results show:
- Download Speed (how fast you receive data).
- Upload Speed (how fast you send data).
- Ping/Latency (how quickly your device connects to the server).
Troubleshotting Tips
If your speed test results are lower than expected:
- Reboot your modem/router.
- Move closer to your Wi-Fi router or use a wired connection.
- Those who use a VPN regularly may benefit from upgrading to the highest speed package available.
Why Wired Speed Tests matter for Vogtmann Engineering Inc. Users
To get the most accurate results of the lightning-fast Fiber to the home, we recommend running your speed test using a wired (Ethernet) connection. Here's why:
- Direct to the Source: Your device connects straight to the Vogtmann Engineering Inc. router, bypassing the variables that can slow down Wi-Fi.
- Stable & Consistent: No interference from walls, appliances, or other networks, just uninterrupted speed.
- Lower Latency: Great for gamers and video callers, who can expect smoother, real-time performance.
- Full Speed Ahead: You're more likely to see the full speed of the internet service VEI provides, assuming your device and cable support it.
Wi-Fi Connection
- Signal Interference: Wi-Fi can be affected by walls, furniture, and even your neighbor's network.
- Distance Matters: The farther you are from your router, the weaker your signal.
- Device Limitations: Older phones, tablets, or laptops may not support the latest Wi-Fi standards.
- Shared Bandwidth: Multiple devices online at once can slow things down.
Bottom Line
A wired speed test shows the true performance Vogtmann Engineering Inc. is delivering to your home. A Wi-Fi test reflects how your specific device performs in your home environment, which may vary.